A clean home is like heaven and it is always welcoming to come to a clean house. It takes a lot of effort to maintain and keep your house clean but it has its own advantages and perks. If you clean regularly and effectively, your house as it will always look as good as new. Hygienically it is important to live in a clean house with or without the virus’ presence.

In this blog, we are sharing some highlights of the Airbnb’s cleaning protocol. A recent survey by Airbnb, guests said that concerns about cleanliness were the biggest barrier to booking a place to stay. We’ll share the Airbnb cleaning protocol with specific guidance on how to clean, what to sanitize, and what supplies to have on hand. They’ve broken the process down into five clear steps, so you’ll know exactly what to do and when to do it.
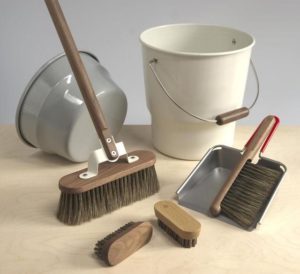
Step 1: Prepare for safer cleaning
- Gather the right cleaning supplies. We recommend only using disinfectant and sanitizer solutions that are registered with your relevant governmental agency (e.g. the European Chemicals Agency or the U.S. Environmental Protection Agency).
- Review the safety guidelines for your chemicals. Always read the labels on your products to understand their active ingredients and how to use them properly.
- Wash your hands for at least 20 seconds with soap and water. If that’s not possible, use a hand sanitizer containing 60% alcohol at a minimum, and refer to your local governmental agency for the latest guidelines.
- Wear protective equipment at all times. Before you enter the space, put on protective equipment such as disposable gloves, aprons or gowns, and masks or cloth facial coverings.
- Ventilate rooms before you clean. The U.S. Centers for Disease Control and Prevention (CDC) recommends opening outside doors and windows and using ventilating fans to increase air circulation in the space before beginning to clean and sanitize.
- Unplug before cleaning. For your safety and to protect fixtures, remember to unplug appliances before cleaning. Plugged appliances that are turned “off” are still connected to electricity until unplugged. You can also shut off the power at the breaker.
Safety reminder: Don’t enter a space without the recommended protective equipment, and don’t reuse soiled gear. Be sure to read all safety labels so you understand how to use cleaning chemicals properly.
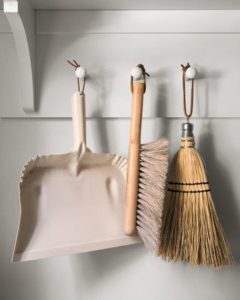
Step 2: Clean dust and debris
Cleaning is when you remove germs and dirt from surfaces. For example, using a soapy cloth to wipe off a kitchen counter or stovetop. It’s important to complete this step before sanitizing your space.
- Take out all the garbage. Starting with this step helps prevent dirty garbage from contaminating the space once it has been cleaned. Make sure to line all the garbage cans, which will make it easier to dispose of tissues and other waste.
- Wash all linens at the highest heat setting recommended by the manufacturer. Avoid shaking dirty linens, which could increase the spread of germs. Remember to change your disposable gloves before you handle any clean linens.
- Wash all dishes, and empty the dishwasher. It’s important to wash all the dishes—even ones in the cabinet—to help ensure hygienic standards. To help avoid cross-contamination, start by walking through the space and collecting dishes from every room.
- Dust the space, and sweep or vacuum the floor. When dusting, start from the top down to ensure there are no visible signs left over. Sweep all hard surface floors, and vacuum carpeting.
- Clean all hard surfaces with soap and water. Wipe each surface down to remove dirt, grease, dust, and germs. Hard surfaces include things like countertops, tables, sinks, cabinets, and floors. When mopping, work from the back corner of the room to the front, and dispose of the water in a sink that hasn’t been cleaned yet.
- Clean all soft surfaces based on the manufacturer’s instructions. Soft surfaces include things like carpet, bedding, curtains, and upholstery. Carefully remove any visible dirt or grime, then clean with the appropriate cleaners indicated for use on these surfaces. If possible, machine-wash items according to the manufacturer’s instructions.
Safety reminder: To help prevent the spread of germs, don’t touch your face while you’re cleaning.
Step 3: Sanitize with disinfectant
Sanitizing is when you use chemicals to reduce the number of germs and bacteria. During this step, we require hosts to sanitize all high-touch areas. For example, spraying chemical disinfectant on doorknobs, light switches, and cabinets.
- Once a hard surface is clean, spray it with disinfectant. Focus on sanitizing all frequently touched surfaces in the space (such as doorknobs and light switches), as well as surfaces that may have touched soiled linens (such as flooring). Be sure to sanitize electronics based on the manufacturer’s cleaning directions.
- Let the disinfectant stay wet for the specified length of time. The product label will specify the wet contact time needed for the chemicals to effectively sanitize a surface. This allows the chemicals time to kill as many germs as possible.
- Allow to air-dry. If the surface dries before the wet contact time, there’s no guarantee that the product has killed the pathogens claimed on the label. When possible, allow the surface to air-dry.
Safety reminder: Be sure to read all safety labels to ensure you’re using cleaning chemicals properly.

Step 4: Check your room-by-room checklists
After cleaning and sanitizing, we ask hosts to review the room-by-room checklists in their cleaning handbook to ensure that all appropriate areas have been cleaned and sanitized. You’ll be able to download the handbook and share it with your co-hosts or cleaning professionals.
- Double-check that all high-touch surfaces were sanitized. Address anything that might’ve been missed.
- Note any maintenance issues or missing items. As you’re passing through to check for completion, note any items that need to be replaced, refilled, or restocked.
Step 5: Reset the room
To help avoid cross-contamination, it’s important to finish cleaning and sanitizing a room before resetting it for the next guest.
- Dispose of and wash your cleaning supplies. Throw away disposable products such as disinfectant wipes. Wash any cleaning cloths at the highest heat setting appropriate for the material.
- Empty and sanitize the vacuum cleaner after every cleaning. Be sure to sanitize any other cleaning tools that were used.
- Safely remove any cleaning gear once you’re done cleaning. Dispose of or wash any protective gear according to their usage guidelines. To help prevent cross-contamination, make sure to put on a new pair of gloves after cleaning each room.
- Wash your hands for at least 20 seconds with soap and water. If that’s not possible, use a hand sanitizer containing 60% alcohol at a minimum, and refer to your local governmental agency for the latest guidelines.
- Visually assess each room to ensure the stage is set for the next guest. Imagine yourself as the guest entering the space for the first time.
- Set out cleaning supplies for your guests. We’ve heard from guests that they want the ability to clean on their own while staying in your space. Empower your guests by setting out cleaning supplies they can use, such as hand sanitizer, disposable paper towels, disposable gloves, disinfectant spray or wipes, and extra hand soap.
- Restock your cleaning supplies. Be sure to check expiration dates and refill any supplies that you’ve used so you’re ready for the next turnover.
Safety reminder: Always keep chemical products out of reach of children.

What does the cleaning protocol mean for hosts?
Hosts will have access to new step-by-step cleaning guidelines, which will cover recommended supplies, sanitization techniques, room-by-room instructions, and more. Hosts can commit to the protocol and let guests know that they’ve agreed to follow the new guidelines. We’re hoping to take some of the guesswork out of cleaning so you can help protect yourself and your guests.
How will guests know that I’ve committed to the cleaning protocol?
Hosts who commit to the protocol will get a special highlight on their listing page, so guests will know they’ve agreed to follow more rigorous cleaning and sanitization practices. There are a few things you need to know about the listing highlight:
- Hosts who want to receive the highlight will need to complete the quiz and the cleaning commitment
- Private and shared room listings aren’t currently eligible to get the highlight—we’re working on ways to elevate private and shared room hosts who are committed to enhanced cleaning standards, so stay tuned for updates
- Hosts with an average cleanliness rating of less than 4 stars can commit to the protocol, but they won’t get the special highlight on their listing until they demonstrate an improvement (that means getting at least three new reviews with 5-star cleanliness ratings)
- Once you commit to the protocol, it can take several days for the highlight to appear on your listing page
Where can I access the new information?
Once the protocol is available in your region, you can download the Airbnb cleaning handbook. Information about the protocol—including an overview of the five-step cleaning process, a list of supplies to stock up on, and a quick-start guide—will also be available to hosts in the Resource Center at Airbnb.com/cleaningresources.
We should all embrace this noble task with reverence and respect.

